Motivation
Data analyses are performed to extract the pertinent informations from a data sample. The task is complex and usually lasts on an extended period of time. It involves many people organised in small groups. One frequent problem in data analysis is that after a certain amount of time reading some old scripts and codes becomes as hard as reading codes written by someone else. Reproducing the results obtained in the beginning of the analysis systematically took more time than it should. At CERN for example, a great effort is focused on Analysis Preservation. For this reason, we started using Snakemake.
Credit
On the idea of Luca Pescatore, we used Snakemake during my master thesis and it appeared to be a crucial tool. We therefore decided to write this tutorial to detail some of our techniques and we hope it will help to spread it among the physics community.
Index
- Snakemake and git: the perfect combination
- Requirements for the tutorial
- Installation on Linux (MacOSX)
- Simple example: plotting various function
- Setting up the environment - setup.sh (Portability)
- Snakemake rules - Snakefile
- Reproducibility
Snakemake and git: the perfect combination
I picture Snakemake as some kind of memory stick to help you store every single steps (or commands) involved in your analysis. As a good memory stick, you can easily share it.
Snakemake is a workflow management system. It basically helps you build pipelines between the various scripts involved in your analysis and their respective inputs and outputs. Snakemake workflows are Python scripts extended by declarative codes to define rules. Once the Snakemake environment is set, one can run multiple rules directly from the command line. By specifying the dependencies between the various scripts, e.g. the output from the rule n is the input from the rule n+1, Snakemake explicitly stores the full architecture of your analysis. Theoretically, if every rule produces an output, one should be able to rerun a complete analysis with a single command. This is where the combination with git becomes really interesting, if the analysis is built in a user-sensitive way, every people involved in the analysis could reproduce any results by a single command in a terminal, without having to open nor read a single line of code written by someone else.
We call this concept analyis preservation and it offers several advantages:
- Memory: stores the architecture of the work and allows you to rapidly perform a complete or partial analysis.
- Portability: if built in a user-sensitive way, anyone working on the same analysis can obtain every results.
- Modularity: as a rule is only a path between an input and an output, if one method or technique used in the analysis needs to be updated or modified, it can be replaced by a new rule with the same output. It allows a parallel comparison of different techniques in a very simple way.
- Reproducibility: if you're analysing a data sample collected by the same experiment in different years of exploitation and you plan to analyse data samples not even collected yet, Snakemake is a simple solution to perform the same analysis to different data sets.
Of course, as every good tools, Snakemake takes some time to set up but spares you countless hours and especially right before deadlines. The purpose of this tutorial is to detail the installation, one simple application and to propose some solutions for the portability and reproducibility. Naturally, these solutions are our own, if you have some better ideas please contact me at stamenkovim@gmail.com or Twitter.
Requirements for the tutorial
For this tutorial, we assume you'll be working from a shell terminal and you have some basic notions of bash, a running python environment and a basic c++ compiler with c++11, e.g. g++.
Installation on Linux (MacOSX)
The easiest way to install Snakemake is via Conda. First make sure that you have the latest version of Miniconda installed.
If you're working on Linux, run the following commands in the terminal:
apt-get install wget
wget 'https://repo.continuum.io/miniconda/Miniconda3-latest-Linux-x86_64.sh'
chmod +x Miniconda3-latest-Linux-x86_64.sh
./Miniconda3-latest-Linux-x86_64.sh
If you're on MacOS:
curl https://repo.continuum.io/miniconda/Miniconda3-latest-MacOSX-x86_64.sh > Miniconda3-latest-MacOSX-x86_64.sh
chmod +x Miniconda3-latest-MacOSX-x86_64.sh
./Miniconda3-latest-MacOSX-x86_64.sh
Once you have the latest version of Miniconda, just run the following commands to download Snakemake and the various libraries required.
conda update conda
conda create -n snake -c bioconda python=3.4 snakemake beautiful-soup pyyaml
conda install -n snake -c https://conda.anaconda.org/conda-forge gitpython
conda install -n snake -c https://conda.anaconda.org/anaconda pytz
If everything went well, you should be able to activate and deactivate the Snakemake environment
source activate snake
source deactivate
See the official manual for more detailed informations.
Simple example: plotting various functions
The purpose of this tutorial is to show you the basics of Snakemake by building a simple example of a workflow. The idea is to demonstrate how easy it is to handle different programming languages as well as a complete architecture of a project within the executing environment. Furthermore, the simple example presented in this tutorial is meant to demonstrate the Memory advantage of the Snakemake environment. It's also a good starting point to present our solutions for the Portability also referred as User-Sensitivity and the Reproducibility. The two latter are not directly a consequence of Snakemake but those properties are really simplified once set correctly.
In order to make it more interesting, we prepared a tutorial starter that can be downloaded from Github or directly from the command line:
git clone https://github.com/mstamenk/snakemake-tutorial-starter.git
The simple example uses mainly three programming languages: bash, c++ and python. The architecture goes as follows:
# Architecture of the project
|--snakemake-tutorial-starter
          |--setup.sh                 # TO BE COMPLETED
          |--Snakefile                # TO BE COMPLETED
          |--config.yml               # TO BE COMPLETED
          |--scripts
                |--setup_path.sh      # TO BE COMPLETED
          |--routines
                |--Analysis.py        # COMPLETE
          |--python
                |--process.py         # COMPLETE
                |--plot.py            # COMPLETE
          |--cpp
                |--src
                      |--produce.cpp  # COMPLETE
          |--resource
C++ - produce.cpp
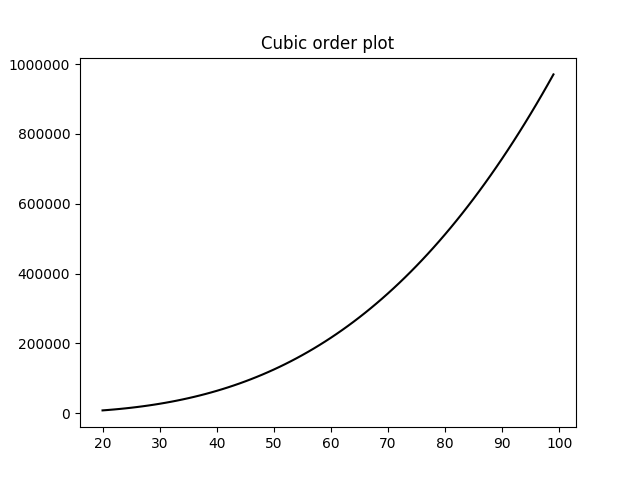
The c++ file produce.cpp is a basic code solving the equation y=f(x) for 4 different modes : Zero , Linear , Square and Cubic. It's built in such a way that, once compiled, every informations can be detailed in the command line:
./produce.out --mode Square
              --start 10
              --end 100
              --location /path/to/folder/
              --saveName Square_forPlotting.dat
For example, the previous command will solve the equation y=x*x for every integers between 10 and 100 and save them in the file /path/to/folder/Square_forPlotting.dat. The final output contains two columns with the x and y values.
Python - Analysis.py - process.py - plot.py
Python is used to superficially handle the different filenames, plot colours and locations required in the analysis.
Analysis.py
This file is the center of the full architecture. It contains every path definition to the various directories in the project as well as the names and specificities of every resource files produced or required. The locations are fetched from a bash script.
process.py
The script process.py simply runs the c++ executable. In some sense, it doesn't add any important information but we choose to run everything from a python script in order to impose the location and the name of the file in which the produced informations are stored. For example, the data produced by the executable for the mode Linear will be stored in the resource directory under the name Linear_forPlotting.dat and plotted in cyan. All these informations are stored in the Analysis.py script and therefore, we make sure that throughout the analysis, we don't need to take care of the names of the various files containing informations as they are all produced and read from the central script Analysis.py.
The following command line is used for the script:
python process.py --mode Square --start 10 --end 100
plot.py
The script plot.py simply reads, for a specific mode, the various informations stored in the resource folder.
python plot.py --mode Square
The previous command will read the file resource/Square_forPlotting.dat and plot the various modes with their respective colors to finally store them in the folder plots/ which location is defined in a user-sensitive way in setup.sh.
Setting up the environment - setup.sh
In order to use Snakemake efficiently, we usually work with at least 2 terminals, one with the snake environment activated and another one with an interactive working environment. Also, Snakemake requires python3. Sometimes, depending on your working habits or the machine on which you perform your analyses, you might want to use python2. We use a single bash script to set the two different environments and handle the proper version of python required for the various scripts.
# setup.sh
#Setting the environment snake/interactive
if [ "$1" = "snake" ]; then
    echo "Setup with snakemake using python3"
    source activate snake
else
    echo "Setup without snakemake using python2"
#    source scripts/setup_path.sh   # Uncomment for python2
fi
The first block defines the environment. One single script can define two different environments. From the command line(terminal):
source setup.sh snake  # For the snake environment
source setup.sh        # For the interactive environment
If the scripts you plan to run with Snakemake are written for python2, one more step is required to set the complete working environment. You need to specify the $PATH to your python2 version. This can be found from the command line:
which python2
In my case, I use the anaconda distribution and the result of the previous command line is /Users/marko/anaconda/bin/python2. Therefore, I add the following line to the script scripts/setup_path.sh:
# scripts/setup_path.sh
export PATH="/Users/marko/anaconda/bin:$PATH"
Once everything updated, if you open two terminals you should be able to set one Snakemake environment with python3 and one interactive environment with python2. I usually use the snake environment as an executing terminal where I run the commands once every script are correctly computed and the terminal with the interactive environment as a testing/developing environment.
Back to the setup.sh, we simply define the macros with the various locations of the folders in the project. This way, every locations are directly accessible from every programming languages involved in the analysis as well as the command line. For this tutorial, these locations are fetched in the routines/Analysis.py script.
# setup.sh
# Definition of various path in the architecture of the project
export TUTO=$PWD
export CPP=$PWD/cpp
export CPPSRC=$CPP/src
export SCRIPTS=$PWD/scripts
export PYTHON=$PWD/python
export RESOURCE=$PWD/resource
export ROUTINES=$PWD/routines
The Portability or User-Sensitivity is defined directly in the bash script. This is useful if you have a certain routine which is different from your colleagues and for example you store your informations, resources or even results in folders that are not in the project directory. Therefore, if you're working in group, you would like the locations of the specific folders to be defined in one place and never think about it again. One solution is to do it directly in the setup.sh. In this example, I define a folder Desktop/plots/ which is not absolute and only accessible for me. If you want to run this example on your machine, you need to create a directory and indicate its path in the elif statement. Don't forget to complete the condition $USER = "" where from a shell terminal you can find the value of $USER with the command echo $USER.
# setup.sh
# Portability (User-sensitivity) - "echo $USER" in command line
if [ "$USER" = "marko" ]
then
    export PLOTS=$HOME/Desktop/plots
elif [ "$USER" = "COMPLETE HERE" ]
then
    export PLOTS=/PATH/TO/PLOTS
else
    echo "Don't forget to compelte the paths in the setup.sh in order to run the scripts!"
fi
Two more lines are required to finalise the working environment. We need to specify the $PYTHONPATH so the modules defined in different folders can be imported one into the other (this step is specific to the way python works). The last line about the PY2 ensures that even if we are working in the snake environment, you still have access to the python2 version.
# setup.sh
# Required to import modules in python
export PYTHONPATH=$PYTHONPATH:$TUTO:$ROUTINES:$PYTHON:$PY2

# Complete if the scripts require python2
export PY2=path/to/python2
In conclusion, the setup.sh bash script has the following advantage:
- Environment setup: we use one script to set up the two different environments (snake and interactive).
- Locations definition: we define the various locations required in our analysis. Since they are defined from a bash script, they are accessible from the terminal and from every programming languages.
- Portability - User-Sensitivity: The locations specific to the users are defined in a user-sensitive way and all handled in a single place. For a group project, a simple update of the repertories (through git) should work without any user-dependant modifications.
- Python multiplicity: the bash script allows the use of multiple versions of python which are simply specified.
Snakemake rules - Snakefile
In order to specify the various rules, the snake environment requires a Snakefile (if your working with vi/vim you might be interested in the syntax file presented in this tutorial). For this example, we need to write the rules to run the scripts from the production of the data to the plotting. The steps are the following:
- Compile the
produce.cppfile in an executableproduce.out - Produce the data with the
produce.outexectuable through theprocess.pyscript - Plot the data with the script
plot.py
The Snakefile is located in the main directory of the project. The first rule we write is the one to compile the c++ file:
# Snakefile
rule compile:
    input:
        script = 'cpp/src/produce.cpp'
    output:
        exe    = 'cpp/produce.out'
    shell:
        "g++ -std=c++11 {input.script} -o {output.exe}"
The syntax of a rule is really easy to understand. In this example, the name of the rule is compile, the input contains one variable script and the output contains the executable exe. The shell command basically compiles the c++ file stored in input into an executable stored in output by using g++ and the option c++11. Now, in the shell terminal with the snake environment, from the directory containing the Snakefile, you can run the following command.
snakemake compile
In this example, you can notice that the path are given in a relative way. It works because the Snakefile is in the main directory but let's imagine you have to change the architecture of the project for some reasons, if all the rules are defined in an relative way, it might take a certain amount of time to correct every path and it would be counter-productive. One clever way to overcome this issue is to use the routines/Analysis.py where every path of the project are defined in the variable loc.
# Snakefile
from routines.Analysis import loc

rule compile:
    input:
        script = loc.CPPSRC + 'produce.cpp'
    output:
        exe    = loc.CPP + 'produce.out'
    shell:
        "g++ -std=c++11 {input.script} -o {output.exe}"
The next step is the processing rule which requires specified options. Snakemake can take arguments directly in the command line through a syntax similar to python.
snakemake process --config mode=Linear start=20 end=100
Of course, an easy solution exist to store the default configurations and modify only the ones you need in the command line. Create a config.yml file and fill it with the defaults values.
# config.yml
mode : Linear
start : 20
end : 100
Once the file created, add the following line on the top of the Snakefile.
# Snakefile
configfile: 'config.yml'
Finally, we finish the pipeline by adding the rules process and plot to the Snakefile. We take advantage of the routines/Analysis.pyfile to handle the absolute path to the different files and we use the function parseDatafiles(dtype) to fetch the name of the .datfile as well as the respective colour for the plot.
# Snakefile
from routines.Analysis import parseDatafiles

setup_path = loc.SCRIPTS + 'setup_path.sh'

filename, c = parseDatafiles(config["mode"])
plotname = filename.replace('.dat','.pdf')

rule process:
    input:
        exe = loc.CPP + 'produce.out',
        script = loc.PYTHON + 'process.py'
    output:
        dat = loc.RESOURCE + filename
    shell:
        "source {setup_path} && $PY2 {input.script} --mode {config[mode]} --start {config[start]} --end {config[end]}"

rule plot:
    input:
        script = loc.PYTHON + 'plot.py',
        dat = loc.RESOURCE + filename
    output:
        plot = loc.PLOTS + plotname
    shell:
        "source {setup_path} && $PY2 {input.script} --mode {config[mode]}"
This is the complete workflow. You might wonder why the shell command starts with a 'source scripts/setup_path.sh', this is in case you have other libraries you would like to add to your working environment. In our case, it's not a necessary step.
Now, you can run the complete job with a single command.
snakemake plot
It should check for the missing files and create them in order to run the final rule.
Finally, if you want Snakemake to rerun the rules where some inputs were modified, you have to trigger it first in the command line.
snakemake -n -R `snakemake --list-input-changes`
Now, if you change the file produce.cpp and run the command snakemake plot --config mode=Square it will automatically compile the executable first and rerun every rules.
Reproducibility
Let's now consider your working on an analysis with multiple data sets, taken at a different year for example. You have built your complete analysis using Snakemake and you would like a simple way to run the same steps for the new data sample. Let's also assume that the type of data set is really similar to the one on which you built Snakemake. The answer is again in the file routines/Analysis.py.
# routines/Analysis.py
NAME = 0
COLOR = 1

dataID = { 'Zero'   : ['Zero_forPlotting.dat',  'b'],
           'Linear' : ['Linear_forPlotting.dat','c'],
           'Square' : ['Square_forPlotting.dat','m'],
           'Cubic'  : ['Cubic_forPlotting.dat', 'k' ]}

def parseDatafiles(dtype):
    return dataID[dtype][NAME],dataID[dtype][COLOR]
If you build your complete analysis using the function parseDatafiles, meaning that every scripts requiring one resource fetches it through this function, by modifying the function itself you should be able to run everything in one single command.
Conclusion
In summary, Snakemake is a powerful tool for analysis preservation. It stores the shell commands that you use throughout your analysis as well as the various ways to run your own scripts. One solution to make it user-sensitive and reproducible is to use the setup.sh and routines/Analysis.py files together. The other advantage we didn't develop in this tutorial is the fact that if you receive a complete analysis via a Snakemake + Git interface and you are not satisfied with one script. You prefer a certain optimisation technique over the one used in the current script, you can just create your custom script and replace the rule without changing the workflow. We call this concept Modularity.
Finally, the four advantages greatly simplified by Snakemake are the Memory, Portability, Modularity and Reproducibility. We hope you appreciated! If you have any comments, suggestions or critics: stamenkovim@gmail.com or Twitter. Thank you!